AI-assisted video post-production: DaVinci Resolve connected to Claude
How I connected DaVinci Resolve to Claude through MCP to animate the Oxi logo, build vertical reels, match color, generate sound effects with code and document it all in an editing guide for the team.
Matías Gaglio ·
Leer en españolProducing short-form video with a small team.
Oxi, the content and analytics agency I am building, publishes reels that explain marketing concepts. Each piece needs brand identity, captions, animations over the presenter, sound effects and a clean vertical format. The bottleneck was not ideas; it was hours of repetitive editing.
A local bridge between Claude and DaVinci Resolve.
I used an open-source MCP server that exposes DaVinci Resolve’s scripting API. Before installing it, we reviewed the installer and the bridge: it only listens on my own computer and requires a random token. It runs in a separate Python environment, with updates set to notify only and a backup of the configuration.
To work, I open Resolve with the project and launch the bridge script from the Workspace menu. From there Claude can create timelines, import media, place clips on tracks, add markers and read rendered frames to review the result.
A logo that types itself.
The logo animation simulates an orange cursor that types the O, the X and the i, jumps to the dot and turns it into the brand’s accent. Layers are generated with Python at the final resolution and assembled in Resolve, instead of cropping a horizontal video, so edges stay sharp.
Orange wink
Key clicks, the cursor snapping into place and a final wink, each sound on its own track so it can be adjusted.
White to orange
The accent flickers like a neon tube until it settles; a rising chord closes the animation.
Chroma loop
Five seconds that start and end on the same frame, with on/off flicker and no semi-transparent frames so the key stays clean.
9:16 for Instagram
The logo fills about 75% of the width and stays clear of the app’s side buttons and bottom caption.
Sound effects generated with code.
The key clicks, snap, neon hum and blips are synthesized with Python. They read their timing from the same script that renders the layers, so if the animation changes, the sound follows. Because the agent cannot listen, verification is visual: waveforms are plotted against frames to confirm that every sound lands on its frame and that the mix stays under −1 dBFS. The final listen is mine.
The same approach produced more assets for the team library: a mechanical counter with 18 ticks, a stereo swipe and irregular typing, prepared with short fades and normalized peaks.
Animations that follow the script.
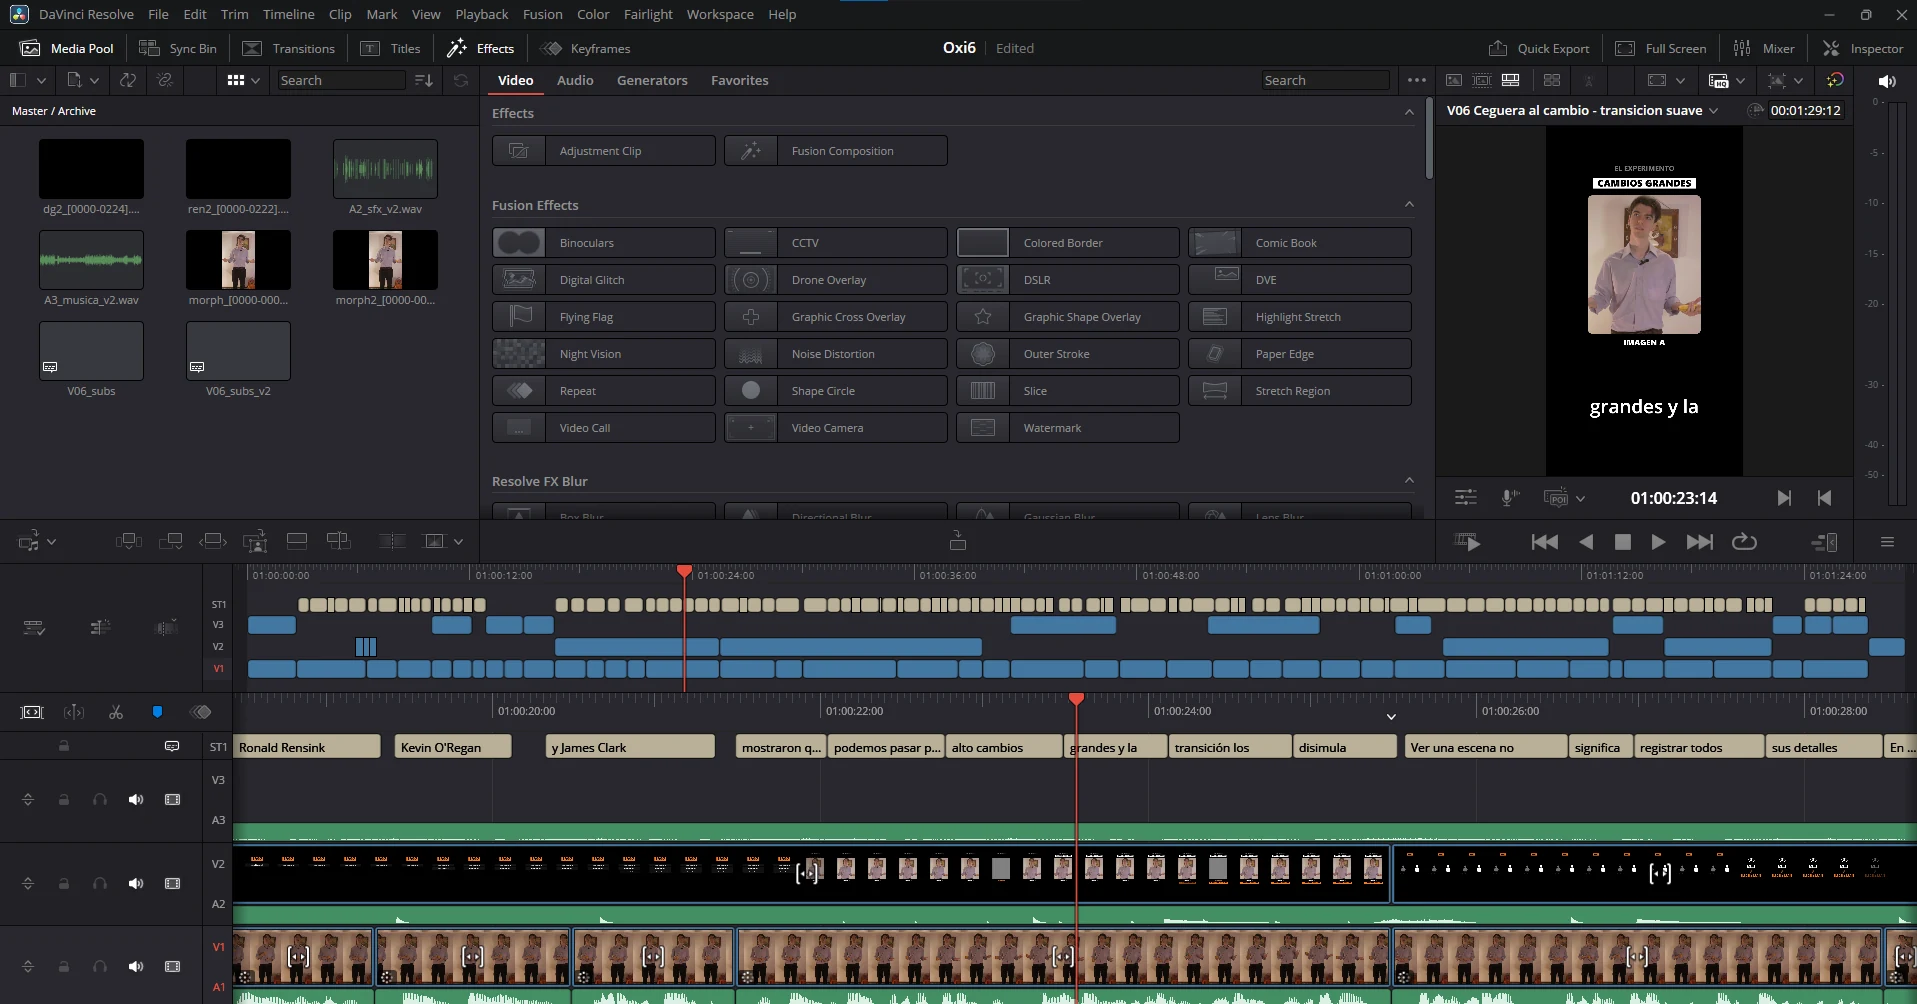
For an episode about search demand, Claude added 11 animations on a new track: a search bar that types itself, results that appear and a card saying your business is missing, words that get struck through, a save button and a closing follow button. Highlighted phrases replace their captions to avoid duplicate text, and every element has its sound: clicks, pops or a cash register.
Turning what we learned into a standard.
The last step was documenting the process so any editor on the team can repeat it. The guide is generated as a PDF with Python and has ten steps in the real order of work:
| Step | What it defines |
|---|---|
| Project | 1080 × 1920 at the camera’s frame rate, with a folder structure. |
| Vertical | Rotation and zoom to turn 1440 × 1080 footage vertical, with the formula for other cameras. |
| Audio | Waveform sync and a cleanup chain targeting −14 LUFS. |
| Color | Waveform, Vectorscope and matching shots against a still in split screen. |
| Cutting | 2 to 4 frames of air, filler words, mid-sentence mistakes and 10–15% zooms to hide jump cuts. |
| Captions | Open Sans 30, at most two lines and about 34 characters per line. |
| Graphics | Which animation to use for what the script says, and how many is too many. |
| Sound | 14 situations, each with its effect, frame and level. |
| Export | Deliver settings, fixing out-of-sync audio with FFmpeg and a final checklist. |
What changed in the process.
- Repetition gets automated: building timelines, placing layers and syncing sounds no longer takes most of the time.
- Judgment gets documented: the guide turns scattered decisions into rules the team can apply.
- Review stays human: watching and listening to the final cut is what decides whether a piece ships.